Sunday, March 13, 2011
NexRemote Nirvana
 I wrote about Celestron’s very special software, NexRemote (NR), some time back. If you’re interested in the program’s history, have a look at that—rat cheer. Lately, though, I’ve gotten a whole lot of confused emails on the subject. “Unk, how do I install NexRemote? How do I connect it to my Celestron telescope? Can I use other software with it? What in the hell will it do for me?” Once you glom on to its concept, NexRemote is easy to understand, but there is no denying it is different from every other bit of astronomy software on the landscape (with the exception of EQMOD).
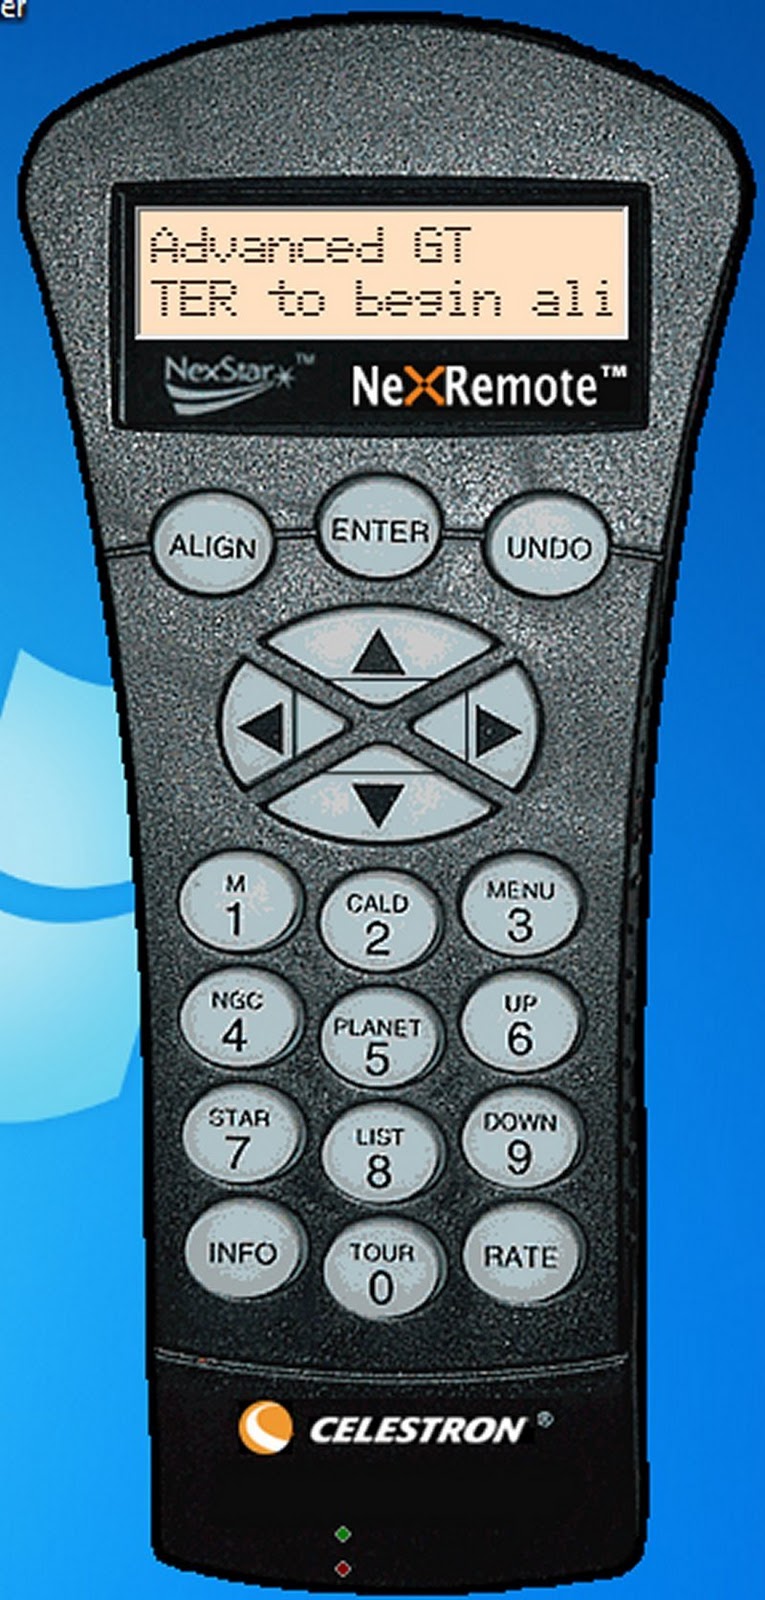
Yep, NexRemote is simple once you wrap your mind around the idea. NexRemote is the same software (firmware) that’s in Celestron’s NexStar hand controls. Due to the exigencies of this software running on a (Windows only) PC, there are slight differences between it and the software in the “real” HC, but they are minor. Let me put it another way: NexRemote is the Celestron NexStar hand control, just executing on your PC instead of the little computer that came with the telescope.
“Hokay Unk, I get it, but why would you want to do such a thing?” Several reasons. If you don’t plan to be standing at your telescope as you observe—maybe with a CCD camera, maybe with a deep sky video camera—NexRemote makes for a much neater setup. Oh, you could buy or build a long extension cable for the NexStar hand controller; I’ve done that very thing. But running the HC on the same computer you use for your CCD program or video capture program makes things less confusing in the middle of the night. I was always tripping over the HC cable and dropping the dang thing as the clock crept into the wee hours.
Another benefit is a reduction in cable clutter. God knows, my cable situation is bad enough: power cable for the telescope, hand control (HC) cable, serial computer cable, guide cable, power cable for the camera, video output cable, dew heater power cable. NexRemote doesn’t eliminate all those, but it at least consolidates hand control, computer control, and guiding cables into one run.
What if you don’t care pea-turkey about imaging the sky? What can NR do for you? One thing I’ve always longed for is a wireless hand controller. No more cable wrap blues, no more too small and finicky buttons. Meade gave it a try with their wireless Autostar II HC and failed, but Celestron succeeded. NexRemote allows you to use a wireless Logitech gamepad with its high quality buttons and joysticks as a wireless hand control. Couple that with the program’s ability to make use of Microsoft’s Mike/Mary voice-synthesis utility and you can align the telescope with the gamepad without having to walk over and peer at the laptop.
What else? NexRemote comes with a pair of add-on programs, NexGPS and NexTour, that add features the real HC cannot claim. NexGPS allows you to use any NMEA serial output-capable GPS receiver with your telescope. That means you do not have to spring for a fancy and expensive Celestron GPS add-on if your scope/mount didn’t come with GPS. I found a perfectly serviceable GPS receiver on a swap table at the local hamfest for 25 bucks. NexTour is almost a full-blown planning software program. It helps you develop lists of objects than can be “loaded” into NexRemote’s virtual HC. Once a list is available, you can go-to its objects using a wireless gamepad.
“You’ve convinced me, Unk. How do I get Nexremote? What else do I need to make it work? How do I set the derned thing up?”
Getting NexRemote is the easy part; you may even already have a copy. Celestron ships NexRemote free with some of their telescopes. Which ones? That question causes Unk to scratch his head. The NexStar SEs, for example, come with it, but the CG5 Advanced Series scopes don’t. Doesn’t seem to be much rhyme or reason to Celestron’s policy as to which buyers get NR for free.
There is also confusion about the license number for the program. You will have to input that (by right-clicking on NexRemote’s virtual hand control) to continue using the program past a 30-day tryout. If you got a NexRemote CD with your scope, it should have that number somewhere on the CD or its container. Often it doesn’t. What then? You are entitled to a license if the program came with your telescope. Call Celestron and get it.
If you were not lucky enough to get NexRemote with your scope? You’ll have to buy, Muchachos. The program is not overly expensive, but Celestron does not exactly give it away at about 100 clams. The toll becomes more bearable if you buy a kit; Celestron often bundles the CD with other items necessary for its use like a USB – serial converter and a “Programming Cable” (more on these two things shortly).
Actually, even if you received the NexRemote CD with your scope, you may need to obtain a copy from the Big C. If the version of the software you received is not v1.7.15 and you are using a Windows computer with a 64 bit Microsoft o/s, you will not be able to run the program until you get a fresh copy. Older versions may not have the latest firmware for your particular telescope, either. Thankfully, NexRemote’s most recent edition is always available for download at Celestron’s website. Do that and you are good to go. You are ready to get started, anyhow.
First step, of course, is loading the program. Before you can load it, however, you will need a computer to load it on. What you want is a Windows laptop. I have heard of folks using NR on Apple Macs with Intel processors and Windows installed on a drive partition, but I cannot vouch for the efficacy of that.
You need a Win machine, but it does not have to be much of a Win machine. When NexRemote (née HCanywhere) first came out years ago, I ran it quite successfully on a ‘puter with a 566mhz Celeron processor. Any fairly recent laptop should be more than sufficient. So should one of today’s netbooks. Not only do you not need a new computer, it may be best not to use one. Why not? The serial port, or lack thereof on modern machines.
NexRemote must communicate with the telescope via an RS-232 port. Alas, modern computers do not have such a thing. The PC I formerly used to run the program, a seven year-old Toshiba Satellite laptop did not. It did have a PCMCIA card slot, though. I logged onto eBay, bought a PCMCIA serial card for ten bucks, and was ready to rock and roll. As far as the computer is concerned, a PCMCIA serial card is the same as a built-in RS-232 port. Yeah, I rocked with NR—till my old Toshiba died a smoky death last year.
While I loved the Toshiba, I was sick and tired of lugging this heavy 3.2ghz monster around, anyway, especially through airports when I was on my way to speaking engagements at distant star parties. I picked a lovely and small Netbook, an Asus, to be my new astro-puter. A cool little machine with more than enough horsepower to run NexRemote. Its processor wasn’t nearly as fast as the Toshiba’s, but 1ghz or so is fast enough. And I was blown away that the Asus’s hard drive was three times the size of the Satellite’s. And that is would run for ten hours or more on its internal battery. Only fly buzzing in the butter? Not only did the Asus not have a serial port, it didn’t have a PCMCIA slot, either.
What to do? The only alternative was a USB to serial adapter cable. I’d tried these with NexRemote before without success. The problem, I suppose, is bandwidth. NexRemote needs substantially more than the average serial application. I did a little digging around on the net and found that quite a few folks were having good results with the Keyspan USB – serial cable. Which is what I bought and which has worked real good with NexRemote—mostly, anyhow.
Serial solution in hand, it is time to load NR. Whether using a CD or a downloaded file, I have never had any difficulties in this area. Follow the onscreen prompts; it’s very straightforward. If you are using Windows Vista or Windows Seven, you may have to install as administrator (right-click the install icon, select properties, and check “run as administrator”), but that is the only potential hang-up I know of.
 Next, you need to physically connect the computer to the scope/mount. And this is where some folks get awfully confused. Well, gather round kiddies, cuz Uncle Rod is going to give you the straight poop on this arcane procedure.
There are two ways to connect NexRemote to the telescope. The neatest way is with what Celestron calls its Programming Cable (so called because years ago you had to use this cable to update Celestron’s motor controller boards). This is a serial cable with a DB-9 connector on one end and an RJ-45 plug on the other, and is designed to use the telescope’s “PC” port. In this method, you connect one end of the PC cable to the PC’s serial port, and the other to the PC port (marked as such and not the socket on the hand control). You do not plug the “real” NexStar controller in anywhere. You leave it in the box. That is the beauty of the PC port method; you do not have to fool with the “hardware” HC at all.
Where do you get a PC cable? Most Celestron dealers still have ‘em even though Celestron has inexplicably discontinued this item. Just be sure you are getting the real programming cable with an RJ-45 connector, not the standard serial cable that plugs into the hand control and which some dealers have taken to calling a “Programming Cable” lately. If you cannot find one and are handy with electronics, you can easily make the cable using the plans on Mike Swanson’s fabulous website, NexStarsite.com.
“That sounds mighty nice, Unk, but I got news: my mount ain’t got no PC port.” It is true most of Celestron’s GEMS lack the required PC port. My CG5 sure doesn’t have one. All is not necessarily lost. Or it used to not be anyway. Until fairly recently, Celestron sold an accessory called an “Auxiliary Port Expander.” This plugged into the hand control receptacle and provided multiple Aux ports and a PC port. Unfortunately, Celestron has discontinued this item, too. Probably because it is not needed to use the new GPS receiver module they are selling. Will they introduce another port expander? Maybe. Does some dealer still have the old ones? Maybe (though my friend Doc Clay Sherrod has not been able to find one). Don’t despair. You do not need a PC port to use NexRemote.
 You can run NexRemote using Way Two. In Way Two, you connect a standard Celestron serial cable to the computer’s serial port. Plug the other end into the base of the hardware HC, just like you would if you were sending the scope on go-tos with Stellarium or Cartes du Ciel. The drawback? You have to have the normal hand control plugged into the telescope, and its presence confusticates some NexRemote newbies.
NexRemote is your hand controller. If you want to use NexRemote, you must do everything—alignments, go-tos, whatever—with NexRemote. You cannot shift back and forth between the hardware HC and NexRemote. Well, there is one exception. You can use the real HC’s direction keys—but only the direction keys. Some folks want to do this when aligning the scope. It’s a pain, after all, to center the stars in finder and eyepiece with the computer, even if it is next to the scope. The real solution, though, is not messing with the real HC—if you accidentally press any button other than a direction key you will have to start over with your alignment—but using a wireless gamepad.
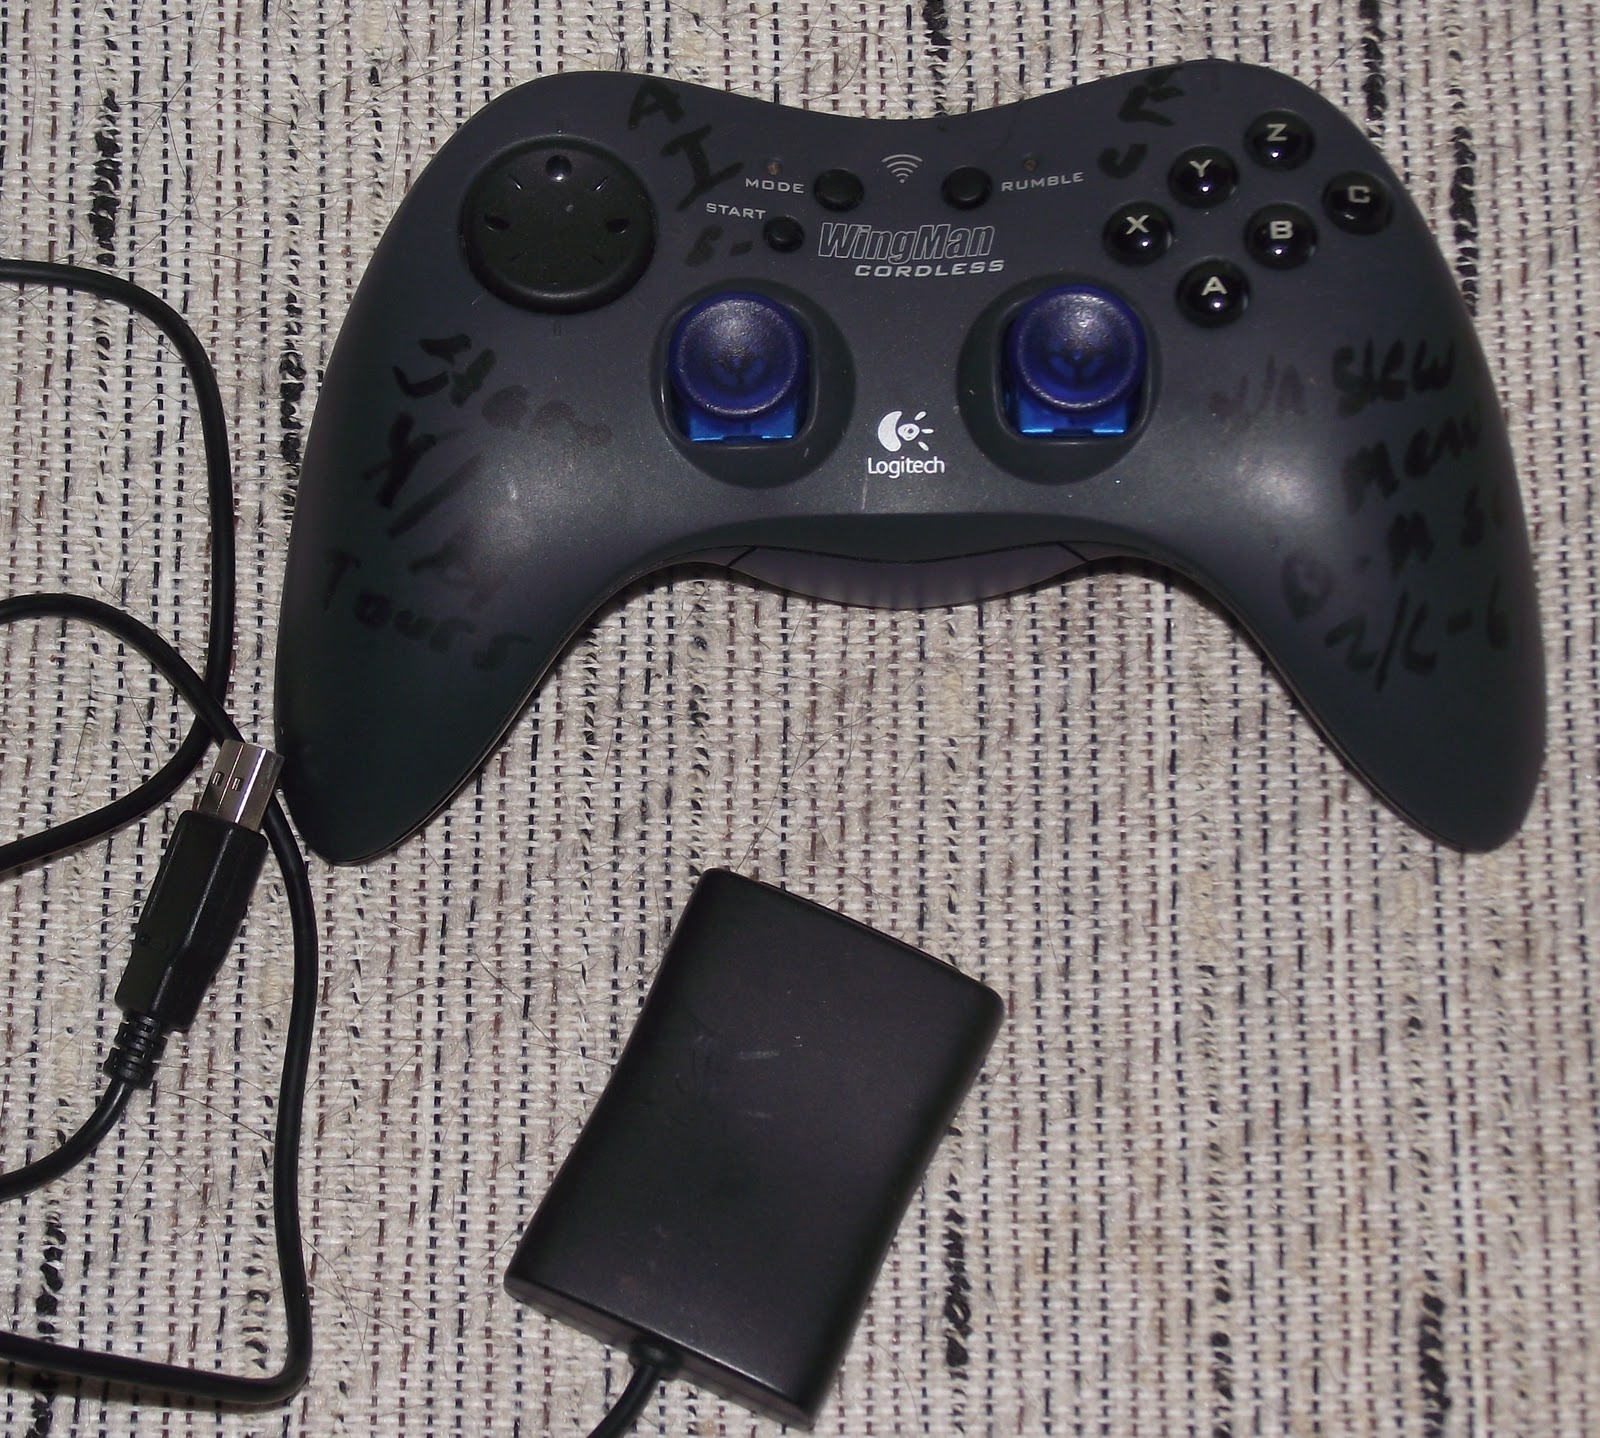
How do you do that? Out of the box (real or virtual), NR is setup to use Logitech’s Wireless Wingman game pads/controllers. It is possible to edit the configuration file in the program to accommodate other controllers, but since Wingman pads are high in quality and fairly easy to get on eBay for not much money, stick with Logitech. Either the Wireless Wingman or the Wireless Wingman II will work fine.
Once you’ve got the software drivers that came with the gamepad installed, the wireless receiver plugged into a USB port, and a handful of AA batteries installed in the Wingman, all you have to do is right-click on NexRemote’s setup screen, select “Enable Joystick,” and go to town. You can set NexRemote to either respond to only N/S – E/W pushes on the right joystick (the left stick is not used) or enable the joystick for all positions—push the joystick to the upper-right “northwest” position and your scope will move northwest. What works best for me is the N/S – E/W only mode.
 How about all those buttons on the hardware HC? The vital ones are mapped to the gamepad’s buttons. You’ve got Align, Enter, Undo, Info, Up, Down, and several others. About all you cannot do from the gamepad is enter object numbers for go-tos, and there is a good workaround for that, as I will describe shortly.
What if you forget which gamepad button does what? You can look at the NexRemote instructions, of course. While NR doesn’t come with a manual, it has a help file that is virtually a manual and which can be printed out. I have mine in a loose-leaf binder. Alas, given my notoriously poor middle-aged memory, I found myself having to refer to the manual all the time. My solution to that annoyance was to write abbreviations for button functions on the gamepad with a permanent marker.
Yes, the gamepad is great. After using the Wingman’s high quality joystick I will never go back to those stinking hand-paddle buttons. But for the gamepad to be truly useful, you’ve gotta kick it up a notch and enable voice output.
NexRemote, as mentioned above, uses Microsoft’s Mike and Mary voice synthesis program. With that installed and enabled (from the setup screen right-click menu), your “telescope” will talk to you. Mary’s (whose voice I prefer) pronunciations are a little odd sometimes (Betelgeuse is a trip), but are easily understandable. What makes the voice option more than just a novelty is that it allows you to align the scope without walking over to the computer. Mary (or Mike) will say the name of the star(s) chosen for alignment, and will instruct you to center them and press Enter/Align as appropriate.
Sometimes, if I want a laugh, I’ll press the Info button and let Mary tell me all about the object in the eyepiece, odd pronunciations and all. Normally, though, I keep the computer audio turned down low so as not offend anybody around me on the observing field. But Mary (actually I now consider the voice to be “Celeste,” my C8’s name) isn’t overly offensive, with most of her comments being confined to things like “Slewing to target…slew complete!”
How does a session go with NexRemote? It goes like this: I set up the scope and the computer, plug the Programming Cable into the PC port—either the real one on my NexStar 11 or the one provided by the Aux Port Expander on the CG5—fire up the mount, and boot the computer. When the computer is up, I hit the NexRemote icon, and a near duplicate of the NexStar HC is soon displayed. Why “near”? There is a set up screen that allows you to select serial ports, real and virtual (more on that last below) and other things.
 Mary-Celeste intones, “Select settings and press OK,” and that is what I do. You do need to enable the joystick for each session, but if you are using the program with the same telescope from the same site as last time, that’s all you should have to do. If you are at a different site, select the site you are at from the right-click menu’s “select site” option, assuming you’ve set a site up with NexGPS (otherwise you’ll enter the site just like you do with the hardware HC). Check to see that the correct serial ports are selected, and like the lady says, press "OK."
If a different telescope than last time’s is being used, you will need to select the telescope firmware version NexRemote should use. This is one of the beauties of NexRemote. With my NexStar 11 GPS I can, for example, select the firmware with the old North and Level alignment routine, my fave, or the more modern software builds that incorporates SkyAlign. For the GEM, I can choose an older version with the Polaris polar alignment routine I favor, or one with the new AllStar system.
After pressing OK, the settings screen is replaced with a simulacrum of the real HC, with the only difference being an indicator at the bottom that shows virtual port activity. From here, the set up procedure is mostly identical to that of the non-virtual HC: select an alignment method and the scope will begin slewing to the first star. How about time/date entry? That’s one difference and another cool thing about NR; the program takes that information from the PC so you do not have to worry about inputting time/date/time zone ever again.
Once Mary mispronounces the name of the first alignment star and tells me to center it in the finder, I go to the telescope Wingman in hand, and use the joystick to center the star, press Enter, center it in the main eyepiece, and press Align. Mary-Celeste then tries to say the name of the next star, and away we go, with her chirping “alignment successful” at the end if all has gone well. During alignment you can use the button mapped to Undo to choose alternate alignment stars if necessary, just as with the hardware HC.
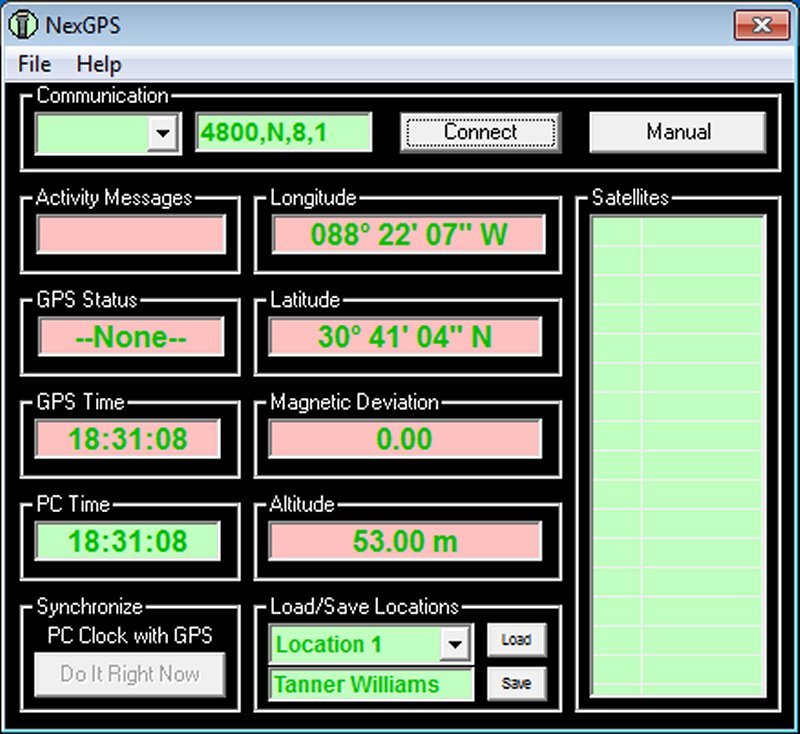
You’ll notice I didn’t mention entering latitude and longitude; that’s because, thanks to one of the two add-on programs that ship with NexRemote, I don’t have to. Fire up NexGPS, attach any serial-NMEA compatible GPS via the manufacturer’s cable, enable the receiver, and GPS fix data will begin flowing. When the program indicates a good fix, hit “pause” and save the lat/lon data under one of four named slots. The program can also update the PC’s clock with GPS time if you tell it to.
So how do you observe with NexRemote? Mostly, it’s just like operating with a normal hand control. If I want to go to M42, I push the Messier button, key in "0042" (using the mouse at the PC), hit Enter, and I am on my way. The other functions and features of the NexStar HC are where they should be in the Utilities, Setup, and other menus.
What if I don’t want to go over to the PC to key in object numbers? I can load a Tour via NexRemote’s right-click menu. If I don’t like the canned tours that ship with NR, I can easily make my own. The excellent program Astroplanner will output observing lists in a format that can be read by NexRemote. Don’t own Astroplanner or want something a little simpler? Get going with NexTour.
NexTour is the other add-on that comes with NR. It is like a little planning program, and is equipped with tools to help filter and select objects from its onboard catalogs, the whole NGC and IC and a few others. When a list is composed, save it and it will appear in the right-click menu as a Tour. Once the tour is selected, you can go from one object to the next using only the Wingman gamepad, skipping objects you don’t want to visit. Tours can be selected using the gamepad, but that’s a little more awkward than just going from object to object within a tour.
“But Uncle Rod, but Uncle Rod, that’s cool, but I want to send the scope on go-tos with Cartes du Ciel (or TheSky or Starry Night Pro or whatever) just like I do with the non-virtual NexStar hand control.”
 No problem, muchacho (at least theoretically). If you want to run with an astronomy program handling the go-tos, select a virtual port from the virtual port pull down on the settings screen. Which port number do you choose? Doesn’t matter; just pick a virtual com port number different from the number of the real one you are using to connect NexRemote to the telescope. You do NOT run another serial cable to the telescope.
When NexRemote is aligned, start up Cartes du Ciel (for example), go to the ASCOM setup window, and select your telescope and com port as per usual. Except: enter the VIRTUAL PORT number you assigned instead of the real serial port number. Your program will then connect to the scope as per normal. Data from Cartes du Ciel (or any other program) will run along the same cable NexRemote is using, whether that’s a serial or Programming cable.
Do you guide your scope during imaging through the serial port? How does that work with NexRemote? You connect your guide program (PHD or whatever you like) to the mount using the virtual port. Need to connect two or more different programs to the scope when using NexRemote? The program’s authors have another application that will allow just that, NexHub, which is available for purchase separately.
Is NexRemote perfect? No, but it is close to it. This is some of the most bulletproof code I have encountered. It’s not been that unusual for me to be using an astronomy program with the real HC, have the netbook go to sleep, and that result in the program’s communications getting all screwed up. NexRemote? Should the PC snooze, when I wake it up NR is still there working its little heart out without complaint.
But, no, nothing is perfect. One of the problems with NR is the serial port conundrum. You must have a good USB – Serial cable if you don’t have access to a hardware serial port. And I’ve discovered that even if you do have a USB - serial that works well with NR, asking it to work with the Virtual Port feature may be too much. That’s what I assume, anyhow, since I have not yet been able to get that working reliably with USB - serial setup on the netbook.
How good is NexRemote? Well, I’ll tell y’all: It is so good that the only time I’ve used a real HC in years has been when I’ve been worried about people tripping over and unplugging the Programming Cable—like at star parties where there’re a lot folks wandering about in the dark like confused zombies. When I have used the non-virtual controller, I’ve pined for NR with its extra features. Most of all, NexRemote it allows me to operate my scopes remotely without fuss or bother. I can stay warm and dry under my tent-canopy and do video observing all night long with the aid of this wonderful program. Thanks Ray and Andre and Celestron. You done good.
Next time: Depends on the weather, y'all...
Comments:
<< Home
I no longer use my NexStar for imaging, but it was a godsend to use a wireless to control the scope!
Highly recommended.
Dave
Highly recommended.
Dave

Nice article.
As one of the people you discussed this with on CN, I appreciate the long version explanation.
I took your advice and bought a wireless wingman used on ebay ($20). I've tested an it works very well.
Thanks again for the details. I'll keep reading it until my brain wraps around it all.
Scott
As one of the people you discussed this with on CN, I appreciate the long version explanation.
I took your advice and bought a wireless wingman used on ebay ($20). I've tested an it works very well.
Thanks again for the details. I'll keep reading it until my brain wraps around it all.
Scott
# posted by  : 11:17 AM
: 11:17 AM
Thanks for that,Unk. I keep telling myself that I am an intelligent man, yet I need someone to whap me upside the head now and then. When Nexremote showed up with my new se8 I could not figure out why in hell you would use it.....it's a handpad on a computer screen. Mind you I'm 50 and have exactly 6 months computer experience(Luddite). I, of course, tossed the CD......I'll take my hat off now......
As always, great article. I use Nexremote to control my CGEM from either my Acer netbook or Thinkpad Z61t. I've never had issues with the USB/serial converter with either computer - I use the keyspan adapter, too, with the Logitech Wireless Rumblepad 2. Just one question... Do you know when Celestron plans to upgrade Nexremote from version 1.7.15? The latest GEM firmware on it is 4.16, and GEM 4.19 has been out for a long time...
73 de NU8H
73 de NU8H
If you do not have a Wingman a small wireless keyboard also works great!
Lyle Mars
Lyle Mars
# posted by : 11:08 AM
: 11:08 AM
Eight months ago I read your Nexremote post and thought it sounded like a cool thing to try.
Last night I finally ran Nexremote and Stellarium with my Celestron 8 Se and it all works just like you said it might. I'm even bugging Celestron for a license key since I tossed my copy of the software (slap).
Wireless is next.
Thanks Unk!
Jim Egstad
Last night I finally ran Nexremote and Stellarium with my Celestron 8 Se and it all works just like you said it might. I'm even bugging Celestron for a license key since I tossed my copy of the software (slap).
Wireless is next.
Thanks Unk!
Jim Egstad
Hi Uncle Rod!
Even though this post is a couple of years old now,
it is still one of the better tutorials/information
sites for getting this all setup and working properly.
I will add my own experience here, and hopefully it
will benefit some in the future.
When the time came for me to get NexRemote working
with my CGEM/Skytools 3 Pro/wireless controller, I
went to Amazon.com and ordered the Celestron USB
adaptor from Focus Camera for $25. When it arrived,
it turned out that they sent me a different adapter,
a Trendnet TU-S9, which I could have purchased on
Amazon for $10. I was irritated, but anxious to get
everything working, so I just opened it and moved on.
The adapter worked fine with NexRemote, but I was unable
to get anything working with the virtual port. I assumed
it was an issue with NexRemote. Over the course of the
following few weeks, I began to research the problem, and
it turned out that it was the adaptor, not the software all
along. I ordered a new controller the next day, and it works
perfectly, even with the virtual ports. The model of the
new cable is the Prolific PL2303HX Rev D Chipset. On Amazon
it is currently $15, and it will work like a charm. If
anyone is researching this to get their setup working, I
hope this information helps you out.
Thanks Uncle Rod!
visit our institute in Nirman Vihar Opposite of v3s mall keep doing them for being a successful career ahead.
Led tv Repairing Institute
Led tv Repairing Institute
Led tv Repairing Institute
LED LCD Repairing institute
Post a Comment
Led tv Repairing Institute
Led tv Repairing Institute
Led tv Repairing Institute
LED LCD Repairing institute
<< Home

